Artificial Grass Install
Get The Best Artificial Grass In Tampa FL
There’s nothing like a nice, green lawn — perfectly trimmed and edged. It’s a look that inspires so many good memories while making photos fantastic.
Unfortunately, our Tampa climate makes it tough to maintain a healthy lawn. You can spend a fortune and countless hours on your yard, only to end up with dried-out patches of grass, weeds and insect infestations, and an overall look that falls short of your expectations.
Instead, we invite you to enjoy low-maintenance, effortless good looks with artificial turf.
Whether you’re looking to create a serene outdoor retreat in your backyard or simply want to spruce up the curb appeal of your business, synthetic turf offers the perfect blend of ease, function, safety and beauty.
Transform your homes curb appeal Instantly
Durable and Long-Lasting
You can enjoy your new landscape for years to come without worrying about replacing it every couple of years. In fact, Shine and Shields' synthetic turf can easily last anywhere from 8 to 15 years or more with proper care.
Request QuoteEasy to Clean and Maintain
If you love the look of a lush green lawn but despise the work (and cost!) it takes to maintain one, artificial grass is the answer. All you need to do is brush away any debris and hose it down occasionally, and your landscaping will look as good as new. How’s that for easy?
Request QuoteVersatile & Customizable
At Shine and Shield Pavers and Turf, we offer a wide variety of synthetic grass options to suit your needs. Want to turn your roof deck into a garden oasis? We can do that! Interested in artificial turf for your pool area? Just ask! Backyards, patios, outdoor play areas for kids and pets, porches, terraces and decks... you name it, we can create it.
Request QuoteWhy Choose Our Artificial Grass?
Ditch the lawnmowers, sprinklers and smelly fertilizers! Once we install your synthetic oasis of nice, green grass, there is virtually no upkeep. Your lawn will look brand-new for years to come throughout all seasons — and you won’t have to worry about mowing, watering or weeding it.
With a natural grass lawn, the fertilizers, pesticides, herbicides and chemicals necessary for upkeep can be harmful to your children or pets. Always keeping your family’s wellness in mind, our high-quality synthetic grass installations require NO chemicals or pesticides. They’re also 100% non-toxic and safe for your loved ones.
Floridians spend thousands each year maintaining their landscaping. Whether you’re purchasing the tools and materials to tend to the yard yourself, or hiring a maintenance team, natural lawn care has a high price tag — plus, a typical 1,800 sq. ft. lawn of natural grass can require 56,000 gallons of water each year.
You don’t have to lift a finger for your lawn to look perfect with synthetic grass! Synthetic grass is an easy way to beautify a space for years to come. No more brown patches, weeds or mess to deal with. It can also withstand more wear and tear than traditional grass. It looks just like the real thing, only better.
Since your new synthetic lawn never needs hydration, you’ll be conserving a significant amount of water — especially in the summer months. It also reduces carbon emissions, since lawn mowers, strimmers, and other maintenance equipment that run on gasoline are not needed for upkeep.

ARTIFICAL TURF GRASS INSTALLATION PROCESS
PRE-INSTALLATION
Pre-installation begins with demolition which involves the removal of any existing soil, weeds, or any substance above ground by rough grading the area and uncovering everything underneath including electric wiring, irrigation, pipes, etc–we can get a solid sub base for the project.
The next step is to install the base material. This is a special mixture of gravel and sand which allows for proper drainage. Install 3 inches in depth. For a non-pet landscape installation, the base material should be installed to a depth of 3 inches.
Next, we wet the existing base to allow for proper settling.
Compaction—compaction is accomplished by vibrating, tamping, and rolling the gravel. This establishes a solid base in which to drive the nails while installing the turf. Any additional leveling or grading can be done at this time.
When trimming the turf to fit the area properly you should over cut the turf by one inch along the edges. This provides the excess turf necessary for tucking. When in doubt, cut the turf fatter as it can always be trimmed later.
When seaming, it is recommended to use the proper seaming tool. Cutting the turf with the special turf knives avoids the possibility of the turf pieces pushing against each other’s angles, which in many cases would create the illusion of discoloration in the area of the seam. Install nails every six inches along the edge. Install nails along the edge by placing them six inches apart driving them down ¾ of the way. Nails used in the field should be applied as necessary to prevent movement of turf. As before, drive the nails down ¾ of the way.
When finishing the nails, separate the grass to avoid pulling down the blades with the nail. The nail is then hidden with the grass blade at the base with the mat. Don’t drive the nails too deeply in the ground as it will cause the turf to be pulled down creating dimples on the surface. Secure seams with U-nails every six inches. During the seaming process, six-inch u-nails are used to join the turf together. The two seams are butted up against each other with u-nails spaced six inches apart. The finishing process with the u-nails is the same as before. Separate the grass to avoid the blades being pulled down with the u-nail. The u-nail is then driven to the same level as the mat and then hidden with the grass blades.
Tucking the turf involves hiding the edges of the turf against any hardscape or edging boarder by using a metal bar called a wonder bar. The side edges of the turf give it a good clean plush look.When seaming, it is recommended to use the proper seaming tool. Cutting the turf with the special turf knives avoids the possibility of the turf pieces pushing against each other’s angles, which in many cases would create the illusion of discoloration in the area of the seam. Install nails every six inches along the edge. Install nails along the edge by placing them six inches apart driving them down ¾ of the way. Nails used in the field should be applied as necessary to prevent movement of turf. As before, drive the nails down ¾ of the way.
When finishing the nails, separate the grass to avoid pulling down the blades with the nail. The nail is then hidden with the grass blade at the base with the mat. Don’t drive the nails too deeply in the ground as it will cause the turf to be pulled down creating dimples on the surface. Secure seams with U-nails every six inches. During the seaming process, six-inch u-nails are used to join the turf together. The two seams are butted up against each other with u-nails spaced six inches apart. The finishing process with the u-nails is the same as before. Separate the grass to avoid the blades being pulled down with the u-nail. The u-nail is then driven to the same level as the mat and then hidden with the grass blades.
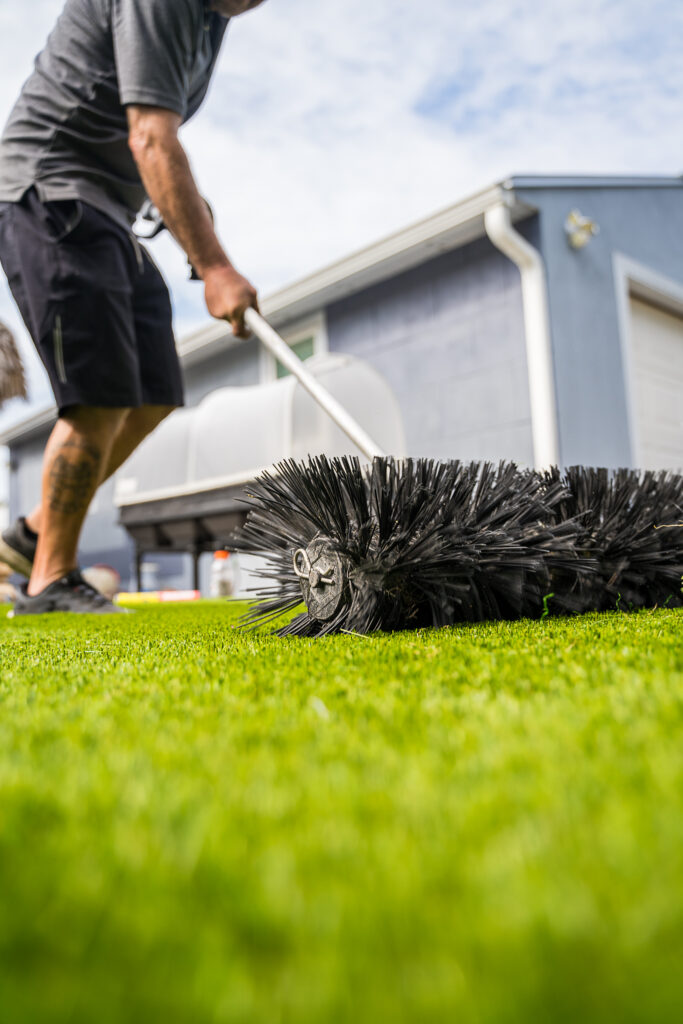
In this phase, a power brush is used. The heavy bristled brush is used to pull against the grain of the grass causing it to stand up in preparation for applying the filling sand. Next apply the Silica Sand Infill or Envirofill. Envirofill is anti-bacterial and not harmful for pets or children. Spread the granules evenly throughout the turf installation. This acts as a balance to hold the blades upright and gives the turf more weight.When finishing the nails, separate the grass to avoid pulling down the blades with the nail. The nail is then hidden with the grass blade at the base with the mat. Don’t drive the nails too deeply in the ground as it will cause the turf to be pulled down creating dimples on the surface. Secure seams with U-nails every six inches. During the seaming process, six-inch u-nails are used to join the turf together. The two seams are butted up against each other with u-nails spaced six inches apart. The finishing process with the u-nails is the same as before. Separate the grass to avoid the blades being pulled down with the u-nail. The u-nail is then driven to the same level as the mat and then hidden with the grass blades.
The final grooming step involves power brushing the turf once again, lightly, to force the Envirofill granules into the base of the turf for settling and optimal stability. Follow up the process to remove any excess debris.

