Paver install
GET THE BEST PAVER INSTALL IN TAMPA FL
At Shine and Shield Pavers and Turf, we bring over 7 years of experience in delivering high-
quality paver installations, backed by ICPI certification and industry-leading techniques for
interlocking paver systems.
We are a licensed and insured contractor and have a team that ensures every project is
completed safely and professionally, while our advanced 2D and 3D rendering technology
allows you to visualize your project before installation begins.
We’re passionate about collaborating with homeowners to create unique, exciting outdoor
spaces tailored to your lifestyle, and we go the extra mile by educating you on maintenance
and best practices to keep your investment looking its best. With the added assurance of
our 10-year sink or settle warranty, you can trust us to deliver durable, beautiful results
and a seamless experience from start to finish.
Let us transform your home into an inviting personal oasis
Interlocking Pavers
Transform your outdoors with expertly crafted interlocking pavers—where beauty meets unmatched durability.
Request QuotePermeable Pavers
Beautifully designed surfaces that work with nature, managing stormwater and elevating sustainability.
Request QuoteReclaimed Brick
Timeless character, eco-friendly charm, and unmatched durability—history beneath your feet.
Request QuoteDriveways
Where durability meets elegance, making every entrance unforgettable.
Request QuotePool Decks
Dive into style and durability with slip-resistant elegance that transforms your outdoor oasis
Request QuotePatios
Craft your perfect outdoor retreat with paver patios and walkways that combine timeless beauty and unmatched functionality
Request QuoteRetaining Walls
Strength meets style, creating durable foundations for stunning landscapes
Request QuoteCommercial Work
Strength, Durability, and Precision—Paving Commercial Success with Cutting-Edge Solutions That Stand the Test of Time
Request QuoteWHY CHOOSE US?
With over 7 years of expertise in paver installation, our team has honed the skills and
knowledge required to handle a wide range of projects, from intricate patio designs to
durable driveways and walkways. This experience means we know what works and how to
overcome challenges, ensuring that every project is executed with precision and
professionalism. You can trust us to deliver results that not only meet but exceed your
expectations, backed by years of proven success in creating stunning outdoor spaces.
Your peace of mind is our priority. As licensed and insured contractors, we guarantee that
every project adheres to the highest standards of safety and compliance. Our team is fully
qualified to handle all aspects of your paver installation, giving you confidence that your
home is in expert hands. We protect both your investment and our workers, ensuring a
stress-free experience from start to finish.
At Shine & Shield, we use state-of-the-art 2D and 3D rendering technology to
bring your ideas to life before construction even begins. These tools allow you to visualize
your dream outdoor space in detail, making it easier to fine-tune your preferences and
make confident decisions. Whether it’s selecting the perfect paver style, pattern, or layout,
our design capabilities ensure the finished product aligns perfectly with your vision.
We believe every homeowner deserves a space that inspires and excites. That’s why we
approach each project with a passion for innovation and collaboration. From the initial
consultation to the final installation, we work closely with you to create something truly
unique and tailored to your lifestyle. The joy of seeing a homeowner thrilled with their
transformed outdoor space is what drives us to deliver exceptional results every time.
Our team is ICPI-certified (Interlocking Concrete Pavement Institute), ensuring we follow
the highest standards in the industry for interlocking paver systems. This certification
reflects our dedication to excellence and our commitment to staying at the forefront of
industry advancements. By adhering to proven installation techniques and best practices,
we guarantee a durable, long-lasting, and structurally sound outdoor space that not only
looks beautiful but also stands up to the test of time. With Shine & Shield, you’re
choosing professionals who prioritize quality at every step.
At Shine & Shield, our commitment goes beyond installation. We
believe in providing a complete experience by educating homeowners on
proper paver maintenance and best practices to ensure their outdoor
spaces remain beautiful and functional for years to come. From cleaning
techniques to seasonal care tips, we empower you to protect your
investment. Additionally, our 10-year sink or settle warranty demonstrates
our confidence in the quality of our work. Should any issues arise within
this period, we’ll address them promptly, ensuring your paver system
remains as stunning and durable as the day it was installed. Your
satisfaction and peace of mind are our top priorities.
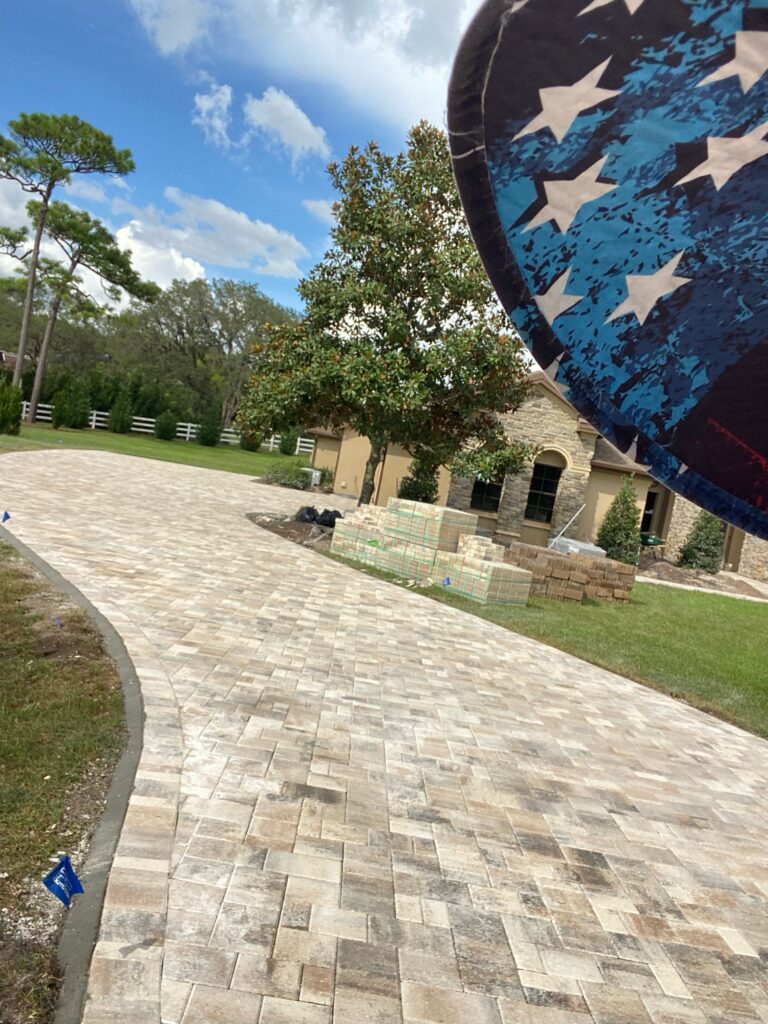
PAVER INSTALLATION PROCESS
Steps for Paver Installation
Decide the Layout and Pattern
- Sketch the area to be paved, marking any curves, edges, and special designs.
Calculate Material Needs
- Measure the area to estimate the number of pavers, sand, and base material required.
Check for Utilities
- Ensure there are no underground utilities where you plan to dig.
Choosing Pavers
- Material Selection:
- Concrete pavers: Durable and cost-effective, ideal for withstanding Florida’s heat and moisture.
- Limestone: Offers a local aesthetic but requires more maintenance.
- Consider factors such as porosity, color retention, and slip resistance for safety and comfort.
- Design:
- Sketch a layout using paper, 2D, or 3D software based on the selected design package.
- Address both aesthetic aspects (patterns, colors) and functional needs like drainage to manage water flow and ensure pavers integrate with existing structures.
- Drainage:
- Account for heavy rainfall by ensuring slopes lead water away from buildings.
- Consider integrating solutions like French drains or box drains if the area is prone to flooding.
- Permits:
- Handle all necessary permits to ensure a smooth installation process without delays or stop-work orders.
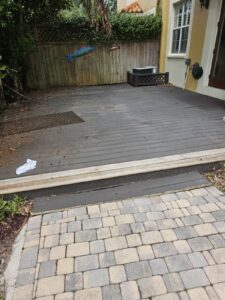
- Handle all necessary permits to ensure a smooth installation process without delays or stop-work orders.
- Material Selection:
Materials
- Pavers
- Base Material: Crushed stone or gravel.
- Sand
- Edge Restraints
All materials will be delivered one to two days before the crew’s arrival to ensure there are no delays during on-site work.
Preparation and Excavation
Mark the Boundaries
- Use stakes and string lines to clearly mark the installation boundaries.
- Identify and mark the location of any underground utilities or obstacles to avoid during excavation.
Excavate
- Depth:
- Excavate to account for the thickness of the pavers and the base layers.
- Follow ICPI Standards:
- Driveways: Excavate to allow for a 6-inch base.
- Walkways and Patios: Excavate to allow for a 4-inch base.
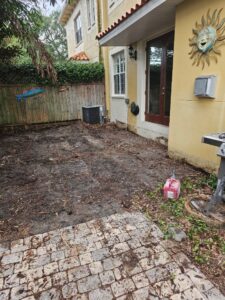
- Depth:
Weed Barrier and Base Installation
Weed Barrier
- Install a durable landscape fabric to inhibit weed growth.
- Overlap pieces by at least 6 inches to prevent gaps.
- This step is completed after excavation but before the base installation.
Base Layer
- Material:
- Use RCA (Recycled Concrete Aggregate), crushed limestone, or granite for the base.
- Select materials that are well-draining yet compactable.
- Open-grade materials, though more expensive, offer better permeability and additional benefits compared to RCA.
- Compaction:
- Compact the base material using a plate compactor in layers.
- Ensure each layer is level, firm, and stable, especially for Florida’s soil conditions.
- Screeding the Base:
- After compacting, use a long, straight screed board to level the surface.
- Move the screed board across the base material, filling in low spots and removing excess to create a consistent foundation.
- Regularly check with a level to maintain accuracy and prevent issues with uneven pavers or improper drainage.
- Material:
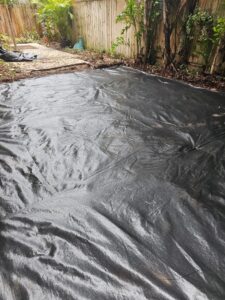
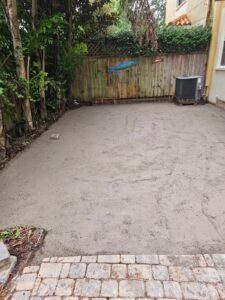
Sand Installation
Spread Sand
- Lay a 1-inch layer of coarse sand over the compacted base.
Screed the Sand
- Use a screed board to evenly level the sand.
- Avoid walking on the screeded sand to maintain its smooth and even surface.
Paver Installation
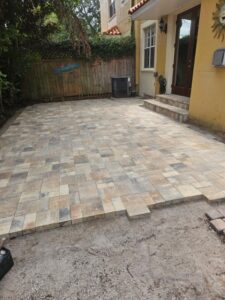
Start at a Corner
- Begin laying pavers at a 90-degree corner or along a straight edge for accuracy.
Follow Your Design
- Place pavers closely together, adhering to the chosen pattern.
Cut to Fit
- Use a wet saw or paver cutter to trim pavers for edge pieces or curves.
Pattern
- Decide on a pattern (e.g., running bond, herringbone) and begin from a fixed point, such as a house corner, working outward.
- Install edge restraints to secure the pavers, especially in areas where soil movement due to moisture is a concern.
Edge Restraints Installation
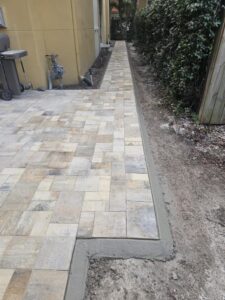
Install Edge Restraints
- Secure the perimeter using concrete edge restraints for a long-lasting and durable solution.
- Mix concrete to the appropriate consistency and carefully trowel it along the outer edges of the paver installation.
Ensure Stability
- Form a consistent and supportive border with the concrete to lock the pavers in place and prevent shifting or spreading.
Curing
- Allow the concrete to cure as per the manufacturer’s recommendations before proceeding with further steps.
Final Steps: Paver Installation
Compact the Pavers
- Use a plate compactor to set the pavers firmly into the sand layer.
Add Joint Sand
- Sand Options:
- Masonry Sand: The industry standard.
- Polymeric Sand: Includes binding agents for added stability.
- Polyresin Sand: Rated for 2500 psi, offering the highest durability.
- Spread the chosen sand over the surface and sweep it into the joints using a stiff-bristle broom.
- The sand fills the gaps, locking the pavers together and providing stability.
- Use a leaf blower on a low setting to remove excess sand from the surface to avoid residue.
- Lightly mist the area with water to activate the binding agents in the polymeric sand.
- Follow the manufacturer’s instructions for additional misting to ensure a strong and durable finish.
- Sand Options:
Compact Again
- Repeat the compaction process to ensure the sand fully fills the joints and stabilizes the pavers.
Final Touches
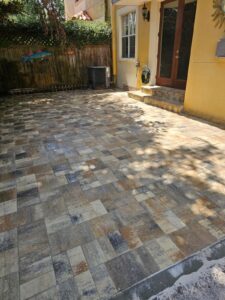
Remove Excess Sand
- Use a broom to sweep away all loose sand from the surface.
- Ensure no sand remains on the paver faces to avoid haze or discoloration, especially when using polymeric or polyresin sand.
Inspect and Adjust
- Carefully check the surface for any uneven pavers or gaps.
- Use a rubber mallet to gently adjust misaligned pavers and ensure a smooth, uniform surface.
Clean the Surface
- Wash the area with a hose or pressure washer (if safe for the pavers) to remove any residual dust or debris.
- Take care not to dislodge the joint sand during cleaning.
Enhance Appearance (Optional)
- Consider applying a paver sealer to enhance the color, add a slight sheen, and provide additional protection against stains and weathering.
- Follow the manufacturer’s instructions for optimal results.
Maintenance and Florida-Specific Tips
Seal the Pavers (Optional)
- Apply a sealer to protect the pavers from stains and enhance their color.
Regular Upkeep
- Refill joint sand as needed and clean the surface periodically to maintain its appearance.
Cleaning
- Sweep regularly and occasionally power wash to remove dirt, leaves, or mold.
- Use a pressure washer carefully to avoid dislodging sand or damaging the pavers.
Re-sanding
- Check for sand loss in joints annually or after heavy rains.
- Reapply sand as needed to maintain stability.
Pest Control
- Monitor for pests and consider using paver treatments or selecting pest-resistant paver types to mitigate issues.
Florida-Specific Tips
Heat Reflection
- Opt for lighter-colored pavers or those with reflective properties to reduce heat absorption, making the area more comfortable in summer.
Humidity
- Be aware that humidity may cause algae or mold, especially in shaded areas. Regular cleaning helps, but consider sealants that prevent biological growth.
Pest Management
- Ensure there is no standing water around or under the pavers to avoid attracting pests or creating breeding grounds for mosquitoes.
- Open Grade Base: This helps with humidity control and pest management.

